Plug it in. Doesn’t matter which port – just plug the thing in.
Step 2
Boot it up. I’m assuming here you have used your Pi before and know how to get into an X session.
Step 3
On your desktop you’ll see an icon like this:

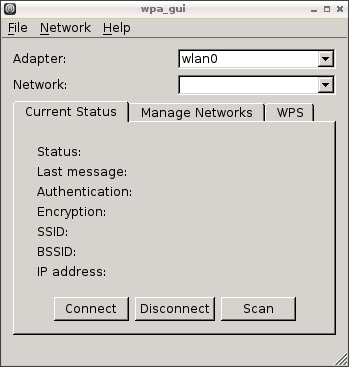
Double-click on it – you’ll see a new window launched entitled wpa_gui (you can also launch this by running sudo wpa_gui from the terminal). This is what it’ll look like:
Step 4
Now here’s where you actually have to do something. As you’ll notice in the image above, there is a single entry in the Adapter list – wlan0. This is the N150 wireless dongle (unless you have other wireless devices). If you see this, you’re OK to proceed.
Next, click on the Scan button. This will bring up a new window:

Step 5
Once you have this window up and you can see your wireless network (you might need to click scan again), double-click on it. You’ll be presented with the following window:
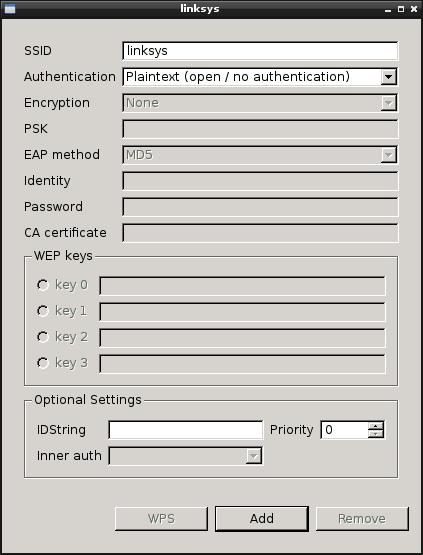
Assuming you don’t want to change any settings (I use MAC filtering rather than encryption, so it was easy enough – I’m assuming it’ll be fairly straight-forward to set up encryption), just click on the Add button. This will add the selected wireless network to a list you want be able to use.
Step 6
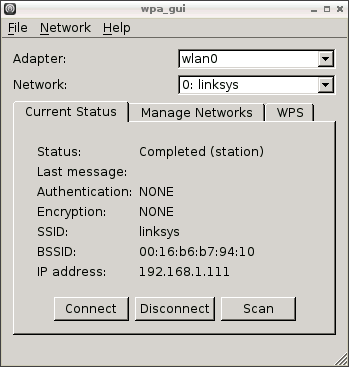
Once you’ve done this, close down this winder and the previous one until you return to the main wpa_gui window. You’ll see you now have your wireless network in the Network list, and looking below that you’ll see a status of Completed (station).
And that’s pretty much it. I’ve been using it all evening without any issue. Hopefully this’ll get you up and running as easily as it did me
taken from : http://www.myraspberrypiexperience.com/


No comments:
Post a Comment