Thursday 12 December 2013

SMS Command Server

I've been a little busy with loads of different projects recently and also entering a API competition
So I made this nice little script.


You can text a keyword to the raspberry pi and then it will execute the command associated with it.
It also has for a bit of security only allow from 1 number (could be altered to use an array of numbers)

Please review and let me know!

This does use the textlocal API but I can use the SMSPI api as well to control things :)

Monday 9 December 2013

Turn Off Red LED on Raspberry Pi Ca,

The Pi camera module includes a red LED in one corner of the PCB. This lights up when the camera is active. It’s really useful in giving a visual indication that the camera is doing something and most of the time you will be glad it is there.

In my testing here are some of the reasons it can get in the way :
  • Pi Camera Module Red LEDIt can cause reflections on objects you are trying to photograph giving them a red glow.
  • For nature photography it scares animals.
  • For security applications it may draw unnecessary attention to the device.
  • It consumes power.

To disable the red LED you simply need to add the following line to your config.txt file :
disable_camera_led=1
To edit the config.txt file you can use Nano :
sudo nano /boot/config.txt
Use the arrow keys to scroll to the end of the file and add “disable_camera_led=1″ to the last line. Press “CTRL-x” to quit. If prompted press “Y” followed by “Return” or “Enter”.
Reboot your Pi with “sudo reboot” and when you next use the camera the red LED will be disabled.

Monday 2 December 2013

Kindle As your raspberry pi monitor

I could mod my Kindle so I can now use it as screen for the RaspberryPi. KindleberryPi makes it possible to have a terminal only, but with my guide you can use it as a complete screen!

How-To for Kindle 4 NT:

1) jailbreak your Kindle: http://wiki.mobileread.com/wiki/Kindle4NTHacking#Jailbreak
2) install USBNetwork: http://wiki.mobileread.com/wiki/Kindle4NTHacking#SSH
3) install KindleVNC viewer: http://www.mobileread.com/forums/showthread.php?t=150434
4) now you can connect to your Kindle (the root password doesn't exist, you can type anything) by doing 
CODE: SELECT ALL
sudo ifconfig usb0 192.168.15.2
ssh root@192.168.15.244

5) start the vnc viewer with
CODE: SELECT ALL
/mnt/us/kindlevncviewer/kvncviewer.sh 192.168.15.2:0 &


6) to autostart the Kindle's viewer once the Pi boots up, link to this script (you need to have sshpass and x11vnc installed!):
CODE: SELECT ALL
sudo ifconfig usb0 192.168.15.2
sudo x11vnc -scale 800x600 -display :0 &
sleep 8
sshpass -p asdf ssh root@192.168.15.244 /mnt/us/kindlevncviewer/kvncviewer.sh 192.168.15.2:0 &

with
CODE: SELECT ALL
[Desktop Entry]
Type=Application
Exec=/home/pi/kindlestart.sh

from ~/.config/autostart/kindlestart.desktop (create the folder if it doesn't exist).

Happy hacking!

taken from - http://www.raspberrypi.org/phpBB3/viewtopic.php?f=41&t=62139

Thursday 21 November 2013

Send a SMS for Free From your Raspberry Pi

SMSPI


Today I am launching a new free service to help people get data out of their raspberry pi.


Send a free sms alter or message using the power of your raspberry pi!

Send via Command line Curl
 curl --data "to=077123456&message=YOURMESSAGE&hash=YOURHASH" http://www.smspi.co.uk/send/  


Thats how Simple it is!

Wednesday 13 November 2013

VIDEO: Set up of Raspberry Pi CAm


Just Follow the instructions here!


Prepare SD Card For Raspberry Pi Video Tutorial


 Follow the video and this will show you how to pre-pare your SD card for Raspberry Pi.

You can also buy pre-made SD cards from Amazon.


Thursday 17 October 2013

Raspberry Pi Stream Webcam to Apache Server


Raspberry Pi Stream Webcam to Apache Server


To Stream Webcam to an Apache Server on the Raspberry Pi you need to have already:
  • Installed Apache – See this post.
  • Installed the Camera Module – See this post.
After you have done this you are ready to start.
First Step – Install FFmpeg
You should download, compile and install FFmpeg, a cross platform solution for streaming and recording including the codec you will need.
Remove any existing installation:
apt-get remove ffmpeg
Get the git installation link from the FFmpeg git page here.
I have included the link in the following commands:
git clone git://source.ffmpeg.org/ffmpeg.git
Once this has completed, move into the directory and compile the source.
cd ffmpeg
./configure
make
make install
This can (and probably will) take hours on the Raspberry Pi so I recommend you put this in a script and run it over night or go watch a film.
Step 2 – Install crtmpserver
This can be done with apt-get.
apt-get install crtmpserver
but you will need to do some configuration, edit the following file:
/etc/crtmpserver/applications/flvplayback.lua
Add/change the following setings:
validateHandshake=false,
keyframeSeek=false,
seekGranularity=0.1
clientSideBuffer=30
And finally restart the service:
service crtmpserver restart
Final Step – Web setup
Install jwplayer on your web server. You can get this at: http://www.longtailvideo.com/, once you have downloaded it, extract the files in:
/var/www/jwplayer
Create an example webpage to display your webcam stream:
<html>
  <head>
    <title>Raspberry Pi Webcam Streaming</title>
  </head>
  <body>
    <div id="video-jwplayer_wrapper" style="position: relative; display: block; width: 960px; height: 540px;">
      <object type="application/x-shockwave-flash" data="/jwplayer/jwplayer.flash.swf" width="100%" height="100%" bgcolor="#000000" id="video-jwplayer" name="video-jwplayer" tabindex="0">
        <param name="allowfullscreen" value="true">
        <param name="allowscriptaccess" value="always">
        <param name="seamlesstabbing" value="true">
        <param name="wmode" value="opaque">
      </object>
      <div id="video-jwplayer_aspect" style="display: none;"></div>
      <div id="video-jwplayer_jwpsrv" style="position: absolute; top: 0px; z-index: 10;"></div>
    </div>

    <script src="/jwplayer/jwplayer.js"></script>

    <script type="text/javascript">
    jwplayer('video-jwplayer').setup({
      flashplayer:"/jwplayer/jwplayer.flash.swf"
      , file:"rtmp://" + window.location.hostname + "/flvplayback/flv:myStream.flv"
      , autoStart: true
      , rtmp:{
        bufferlength:0.1
      }
      , deliveryType: "streaming"
      , width: 960
      , height: 540
      , player: {
        modes: {
          linear: {
            controls:{
              stream:{
                manage:false
                , enabled: false
              }
            }
          }
        }
      }
      , shows: {
        streamTimer: {
          enabled: true
          , tickRate: 100
        }
      }
    });
    </script>
  </body>
</html>
Now check it works! Make sure you connect to it locally and not remotely. (192.168.* address).
To start the stream run the following command:
raspivid -t 0 -w 960 -h 540 -fps 25 -b 500000 -vf -o - | ffmpeg -i - -vcodec copy -an -f flv -metadata streamName=myStream tcp://0.0.0.0:6666
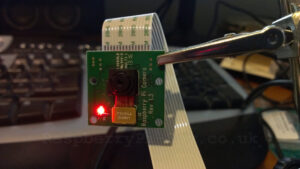
You should see a video stream similar to the image below:
Raspberry Pi Webcam Streaming
(Yes, the webcam is pointed at the wall).
If you want to make this webcam stream accessible remotely, you need to port forward port 1935 to the raspberry pi.
Voila, now you can Stream Webcam to Apache Server on the Raspberry Pi.


Plus i am using it and it works wonders

Friday 11 October 2013

Monday 7 October 2013

How to install SSH for PHP5

from time to time you may need to do SSH commands to other pi's.

you can achieve this via php :)

1) Install SSH for PHP - sudo apt-get install libssh2-1-dev libssh2-php

2)Check that is installed: php -m |grep ssh2

3: Restart apache: sudo service apache2 restart

Now for the PHP part

$connection = ssh2_connect('shell.example.com', 22);
ssh2_auth_password($connection, 'username', 'password');

$stream = ssh2_exec($connection, '/usr/local/bin/php -i');

Amazon

Donate

Donate Towards More Raspberry PI's for Projects