Friday, 27 September 2013

Minecraft for Raspberry Pi

The first iteration of Minecraft: Pi Edition is now available! And it’s completely free to download. We’re adding new features in due course, but thought you guys would appreciate us getting something out to you as soon as possible.
Daniel Frisk has provided the following instructions on how to get started.
  • Minecraft – Pi Edition runs on Raspbian “wheezy” with XWindows. If you need to set that up, visit http://www.raspberrypi.org/downloads and follow the detailed instructions within.
  • Boot up your Raspberry Pi with Raspbian. If you haven’t set XWindows to start automatically upon boot, type in “startx”.
  • Next click the icon for LXTerminal to open a new terminal window. Use the following commands (in bold) to download and launch:
To download it: click here or visit https://s3.amazonaws.com/assets.minecraft.net/pi/minecraft-pi-0.1.1.tar.gz
To decompress it: tar -zxvf minecraft-pi-0.1.1.tar.gz
To run it: cd mcpi
Followed by minecraft-pi
Read more about the Pi, and find out what you need to get started, at their official site and dedicated wiki.
Have fun!

taken from : http://pi.minecraft.net/

Google Voice as Landline for Raspberry Pi

Have you ever wanted to stop paying for a landline but didn't know how?  In this article I'll review the steps I used to configure a VoIP land line using a SIP interface through a Raspberry Pi based PBX with Freeswitch and Google Voice.  In other words, make free calls!  NOTE: You will not have 911/Emergency services with this solution!
I spent the better part of the weekend reading wiki's, blogs, manuals and other posts and had to piece them all together to get my own personal solution working.  I thought it would be useful to write it up and share my experiences.


I've tried to capture my steps as best as I could .  Please let me know if anything does not work or needs to be amended.
Things you'll need:
  1. Raspberry PI with "wheezy-raspbian" connected to your network.
  2. A SIP device or software, like XLITE.  I'm using an old Sipura SPA-2100.  One end connected to your physical phone line and the other to your network.
  3. A Google voice account.
  4. Test your Google voice account, try calling a number from the web UI.
  5. Log into Google Voice:
    • Click on Settings > Phones
    • Uncheck all phones
    • Check Google Chat
    • Log out of gmail ( Or turn off chat at the bottom of the gmail page)
Steps: (on your Raspberry Pi as root)
  • Install dependencies 
    • #apt-get install autoconf automake gawk g++ git-core libjpeg62-dev libncurses5-dev libtool make python-dev gawk pkg-config  libperl-dev libgdbm-dev libdb-dev libssl-dev
  • Download, Compile and install freeswitch. NOTE: This step takes a few hours to compile.  
    • #mkdir /usr/local/freeswitch 
      #useradd freeswitch -d /usr/local/freeswitch
      #chown -R freeswitch:freeswitch /usr/local/freeswitch
    • #cd /usr/local/src
      #git clone git://git.freeswitch.org/freeswitch.git
      #cd /usr/local/src/freeswitch
      #./bootstrap.sh && ./configure --prefix=/usr/local/freeswitch && make clean && make clean modwipe && make && make install
    • Make sure the following line is present and uncommented in /usr/src/freeswitch/modules.conf
      endpoints/mod_dingaling
      
      And build mod_dingaling:
      #make mod_dingaling-install
  • Make sure mod_dingaling is not commented out in file conf/autoload_configs/modules.conf.xml
    •  <load module="mod_dingaling"/>
  • Edit the conf/jingle_profiles/client.xml and replace all its contents with the following.  Then replace  only the highlighted fields with your Gmail username and password.
    • <include>
        <!-- Client Profile (Original mode) -->
        <!-- to use this profile take the x- away from the open and close tags so its <profile> and </profile> -->
      <include>
        <profile type="client">
          <param name="name" value="gtalk"/>
          <param name="login" value="YOUR_GMAIL@gmail.com/talk"/>
          <param name="password" value="GMAIL.PASSWORD"/>
          <param name="server" value="talk.google.com" />
          <param name="message" value="Thanks Google!" />
          <param name="dialplan" value="XML"/>
          <param name="context" value="default"/>
          <param name="exten" value="2001"/>
          <param name="rtp-ip" value="auto"/>
          <param name="auto-login" value="true"/>
          <param name="sasl" value="plain"/>
          <param name="server" value="talk.google.com"/>
          <param name="tls" value="true"/>
          <param name="use-rtp-timer" value="false"/>
          <param name="vad" value="none"/>
          <param name="candidate-acl" value="wan.auto"/>
          <param name="local-network-acl" value="localnet.auto"/>
       </profile>
      
      </include>
      
  • Start freeswitch manually and test module
    • #/usr/local/freeswitch/bin/freeswitch 
  • You should get a console like this:


  • Try running reload mod_dingaling  if you entered the correct credentials and all was compiled 
  • correctly, you should see the following message:
  • 
    +OK Reloading XML
    +OK module unloaded
    +OK module loaded
    
    freeswitch@pbx> 2012-12-30 19:52:59.136376 [NOTICE] libdingaling.c:1674 XMPP server connected
    
    2012-12-30 19:52:59.356369 [NOTICE] libdingaling.c:1686 XMPP authenticated
    
  • Exit the freeswitch console using the shutdown command, and return to the shell prompt.
  • Edit the conf/directory/default.xml and replace all its contents with the following.  Then replace  only the highlighted fields with your SIP device IP address
    • <include>
        <!--the domain or ip (the right hand side of the @ in the addr-->
        <domain name="192.168.0.XXX">
          <params>
            <param name="dial-string" value="{^^:sip_invite_domain=${dialed_domain}:presence_id=${dialed_user}@${dialed_domain}}${sofia_contact(*/${dialed_user}@${dialed_domain})}"/>
          </params>
      
          <variables>
            <variable name="record_stereo" value="true"/>
            <variable name="default_gateway" value="$${default_provider}"/>
            <variable name="default_areacode" value="$${default_areacode}"/>
            <variable name="transfer_fallback_extension" value="operator"/>
          </variables>
      
          <groups>
            <group name="public">
              <users>
                <X-PRE-PROCESS cmd="include" data="default/*.xml"/>
              </users>
            </group>
          </groups>
      
        </domain>
      </include>


  • Create a file called conf/directory/default/2001.xml and paste the following contents, replacing only the highlighted fields with any random password (save it for later) and your name, which will be used for caller id.
    • <include>
        <user id="2001">
          <params>
            <param name="password" value="MAKEUPONE"/>
            <param name="vm-password" value="1000"/>
          </params>
          <variables>
            <variable name="toll_allow" value="domestic,international,local"/>
            <variable name="user_context" value="default"/>
            <variable name="effective_caller_id_name" value="John Doe"/>
            <variable name="effective_caller_id_number" value="2001"/>
            <variable name="outbound_caller_id_name" value="$${outbound_caller_name}"/>
            <variable name="outbound_caller_id_number" value="$${outbound_caller_id}"/>
            <variable name="callgroup" value="default"/>
          </variables>
        </user>
      </include>
      

  • Login to your SIP (Or SIP software), and enter the following . (NOTE I will only demonstrate on the SPA-2100, other solutions will have different screens).  
    • In the proxy (or domain) type in the IP address or hostname of your freeswitch PBX.
    • The Display Name can be anything you want.
    • User ID should be 2001 (because that is what I set it to).
    • The passowrd  is from the one you made up above.
  • Start freeswitch on the command line /usr/local/freeswitch/bin/freeswitch
  • Save and reboot the SIP device.  You SIP device should now be registered. You can test by way of hearing a dial tone on your phone.
  • Open another login window to your PBX and leave the previous freeswitch console open in the the other window. We'll reference it later.
  • Edit the conf/dialp/default.xml and add the following, right after the "unloop" extension section.  Then replace only the highlighted fields with your SIP device IP address.
    •  <extension name="gvoice_in">
        <condition field="source" expression="^mod_dingaling$">
          <!--<action application="info" />-->
          <action application="log" data="CONSOLE GV CALL IN!" />
          <action application="log" data="CONSOLE ${destination_number}"/>
          <action application="start_dtmf" />
          <action application="set" data="execute_on_answer=send_dtmf 1@2001"/>
          <!--<action application="cidlookup" data="$1"/>-->
          <action application="set" data="hangup_after_bridge=true" />
          <!--<action application="set" data="originate_continue_on_timeout=true"/>-->
          <!--<action application="set" data="call_timeout=35"/>-->
          <action application="bridge" data="user/2001@192.168.0.XXX"/>
          <action application="answer"/>
        </condition>
      </extension>
      
      <extension name="gvoice_out">
        <condition regex="any">
          <regex field="destination_number" expression="^(\d{10})$" />
          <regex field="dialed_extension" expression="^\+1(\d{10})@voice.google.com$" />
          <regex field="destination_number" expression="\+1(\d{10})$" />
          <action application="set" data="hangup_after_bridge=true"/>
          <action application="set" data="ringback=${us-ring}"/>
          <action application="set" data="call_timeout=45" />
          <action application="ring_ready"/>
          <action application="bridge" data="dingaling/gtalk/+1$1@voice.google.com"/>
        </condition>
      </extension>
      
      
  • Edit the conf/autoload_configs/dingaling.conf.xml and replace all its contents with the following.  
    • <configuration name="dingaling.conf" description="XMPP Jingle Endpoint">
        <settings>
          <param name="debug" value="0"/>
          <param name="codec-prefs" value="PCMU"/>
        </settings>
      
        <X-PRE-PROCESS cmd="include" data="../jingle_profiles/*.xml"/>
      
      </configuration>


  • Go back to the freeswitch console window and type reloadxml  then  reload mod_dingaling 
  • Now you are can test making outgoing and receiving calls.
  • If all works to your satisfaction, its time to make freespace start automatically at boot time.
Creating a Freeswitch boot service
  • Create a new file called /etc/init.d/freeswitch paste the contents from this file.
#chown -R freeswitch:freeswitch /etc/init.d/freeswitch
#chmod +x /etc/init.d/freeswitch
#update-rc.d  freeswitch defaults
#/etc/init.d/freeswitch start


  • Reboot the pbx and check that the daemon started successfully and that everything is working.
Voice Codec Optimization
I found that the default codec causes outgoing calls to be choppy.  To fix this, I changed the default codec to PCMA.

Replace the following in conf/vars.xml


<X-PRE-PROCESS cmd="set" data="global_codec_prefs=G7221@32000h,G7221@16000h,G722,PCMU,PCMA,GSM"/>
<X-PRE-PROCESS cmd="set" data="outbound_codec_prefs=PCMU,PCMA,GSM"/>
with the following
<X-PRE-PROCESS cmd="set" data="global_codec_prefs=PCMA"/>
<X-PRE-PROCESS cmd="set" data="outbound_codec_prefs=PCMA"/>
Save the file and stop and start the service
#service freeswitch stop  && sleep 15 && service freeswitch start

freeswitch startup script


#!/bin/sh
# Start/stop the freeswitch daemon.
#
### BEGIN INIT INFO
# Provides:          freeswitch
# Required-Start:    $network
# Required-Stop:
# Should-Start:
# Should-Stop:
# Default-Start:     2 3 4 5
# Default-Stop:  0 1 6
# Short-Description:
# Description:
### END INIT INFO

PATH=/bin:/usr/bin:/sbin:/usr/sbin
DESC="freeswitch"
NAME=freeswitch
DAEMON=/usr/local/freeswitch/bin/freeswitch
DARGS="-nc"
PIDFILE=/var/run/freeswitch.pid
SCRIPTNAME=/etc/init.d/"$NAME"

test -f $DAEMON || exit 0

. /lib/lsb/init-functions


# there because it should be in /etc/default/locale.
parse_environment ()
{
    for ENV_FILE in /etc/environment /etc/default/locale; do
        [ -r "$ENV_FILE" ] || continue
        [ -s "$ENV_FILE" ] || continue

         for var in LANG LANGUAGE LC_ALL LC_CTYPE; do
             value=`egrep "^${var}=" "$ENV_FILE" | tail -n1 | cut -d= -f2`
             [ -n "$value" ] && eval export $var=$value

             if [ -n "$value" ] && [ "$ENV_FILE" = /etc/environment ]; then
                 log_warning_msg "/etc/environment has been deprecated for locale information; use /etc/default/locale for $var=$value instead"
             fi
         done
     done


# Get the timezone set.
    if [ -z "$TZ" -a -e /etc/timezone ]; then
        TZ=`cat /etc/timezone`
    fi
}

# Parse the system's environment
if [ "$READ_ENV" = "yes" ] ; then
    parse_environment
fi


case "$1" in
start)  log_daemon_msg "Starting freeswitch " "freeswitch"
        ulimit -s 240
        OLDPID=`pgrep $NAME`
        NEWPID=`cat $PIDFILE` 2>/dev/null
        if [ "$OLDPID" =  "$NEWPID" ] ; then
                echo "Service already running " && exit 1
        else
                su - $NAME -c "$DAEMON $DARGS " >/dev/null 2>&1
        fi
        sleep 1
        ps -ef|grep $DAEMON|grep -v grep|awk '{print$2}' > $PIDFILE
        log_end_msg $?
        ;;
stop)   log_daemon_msg "Stopping freeswitch" "freeswitch"
        kill `cat $PIDFILE` >/dev/null 2>&1
        RETVAL=$?
        [ $RETVAL -eq 0 ] && [ -e "$PIDFILE" ] && rm -f $PIDFILE
        log_end_msg $RETVAL
        ;;
restart) log_daemon_msg "Restarting freeswitch" "freeswitch"
        $0 stop
        $0 start
        log_end_msg 0
        ;;
status)
        status_of_proc -p $PIDFILE $DAEMON $NAME && exit 0 || exit $?
        ;;
*)      log_action_msg "Usage: /etc/init.d/freeswitch {start|stop|status|restart|reload|force-reload}"
        exit 2
        ;;
esac
exit 0 
Taken From http://raspberrypipbx.blogspot.co.uk/

Autologin for Raspberry pi

You will no longer have to keep Logging in with Startx, or user and pass to get into ur LXDE after this one. Ideal for servers/car computers etc.

Log into your Pi, then type:

sudo nano /etc/inittab

Look for the line:

Quote
1:2345:respawn:/sbin/ getty 115200 tty1

Just add a "#" infront of it to disable it:

#1:2345:respawn:/sbin/ getty 115200 tty1

Add this line under it:

1:2345:respawn:/bin/login -f pi tty1</dev/tty1>/dev/tty1 2>&1

Hit CTRL + X and Y to save.

Type:

sudo nano ~/.bash_profile

Type:

startx

Hit CTRL + X and Y to save.

Now:

sudo reboot

It should now boot automatically.

Taken From: Raspberry Pi Tutorials

Friday, 13 September 2013

Control your Home with the Raspberry pi! -

While any one that has looked at this blog for a while notice's some posts are rubbish some are great but here is what i have done.

RPI Control


You can turn things on and off and this script can be downloaded from http://www.github.com/txt3rob/RPI-Control

It links to all the things you need and if you can send some £ my way so i can but a rpi-cam!

How to set up a mail server on your raspberry pi


Step 1: Read the link below:
How to Install mail server on raspberry pi

Thursday, 29 August 2013

Quick Tip: Change DNS on Raspberry pi

How to change the DNS server on your raspberry pi

If you are using Debian on Raspberry Pi, then you need to edit /etc/resolv.conf
sudo nano /etc/resolv.conf
then add the server IP of the openDNS
nameserver  208.67.222.222
nameserver 208.67.220.220

Or for Google DNS

nameserver  8.8.8.8
nameserver 8.8.4.4

Wednesday, 21 August 2013

Send IP info on boot up.

Send a SMS with your internal and External IP for your Raspberry PI

First Grab a Text Local account from 

CODE: SELECT ALL
<?php
//  Pi - SMS - What is my IP bro?!
//  By Robert Wiggins
//  txt3rob@gmail.com
// Paypal Donate and let me get a Raspi-Cam!

// get the local hosts ip address
$ip = str_replace("\n","",shell_exec("ifconfig eth0 | grep 'inet addr' | awk -F':' {'print $2'} | awk -F' ' {'print $1'}"));


// External IP
$externalContent = file_get_contents('http://www.icanhazip.com/');


// Configuration variables
$info = "1";
$test = "0";

// Data for text message
$uname = '';
$pword = '';
$from = "Robbies PI";
$selectednums = "44";
$message = "You Pi Info LAN:".$ip." Ext: ".$externalContent." Raspberry Pi LCD";
$message = urlencode($message);

// Prepare data for POST request
$data = "uname=".$uname."&pword=".$pword."&message=".$message
."&from=". $from."&selectednums=".$selectednums."&info=".$info."&test=".$test;

// Send the POST request with cURL
$ch = curl_init('https://www.txtlocal.com/sendsmspost.php'); //note https for SSL
curl_setopt($ch, CURLOPT_POST, true);
curl_setopt($ch, CURLOPT_POSTFIELDS, $data);
curl_setopt($ch, CURLOPT_RETURNTRANSFER, true);
$result = curl_exec($ch); //This is the result from Textlocal
curl_close($ch);

//echo
echo ('You Pi Info LAN: '.$ip.' Ext: '.$externalContent.' Raspberry Pi LCD');
?>


Add A New Cron Job

To create a new job to Cron we will modify the “crontab”. This is a table that contains the list of jobs that Cron will monitor and run according to it’s details. To edit it we use the command :
sudo crontab -e
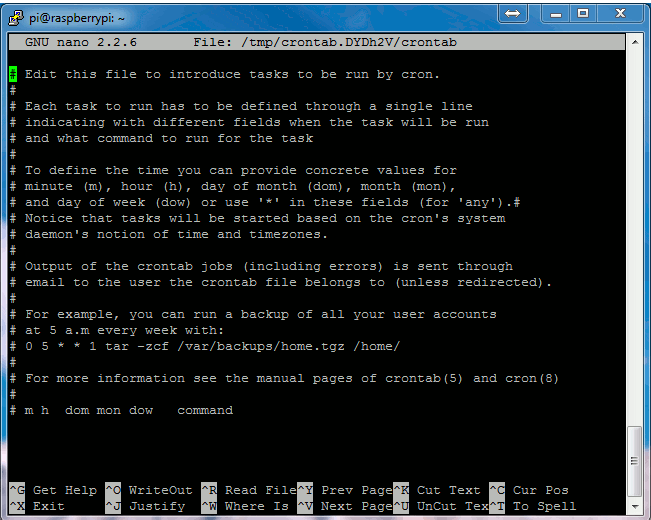
Each user of the system (ie “pi”) can have its own Crontab but in this case we want to add it as an admin so we prefix our “crontab -e” command with “sudo”. You should see something that looks like this :
Crontab Example - Python at Boot
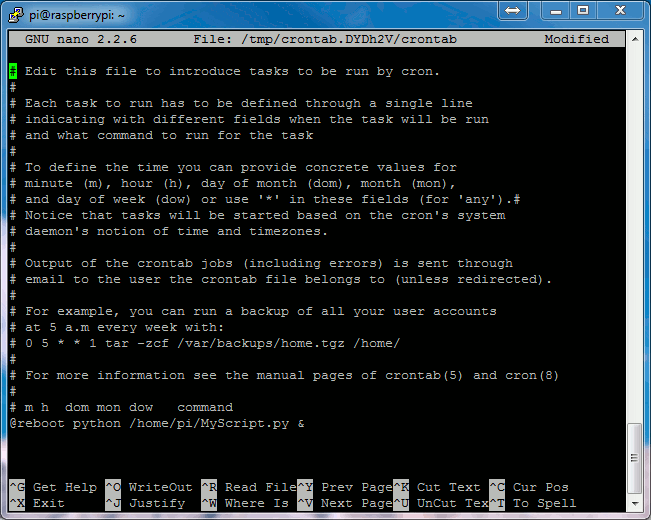
Using your cursor keys scroll to the bottom and add the following line :
@reboot php /var/www/piboot.php &
This tells Cron that every boot (or reboot or start-up) we want to run PHP with the script piboot.php. The “&” at the end of the line means the command is run in the background and it won’t stop the system booting up as before.
Your screen should look something like this :
Crontab Example - Python at Boot
To save these changes click “CTRL-X”, then “Y” and finally “Return”. You should now be back at the command prompt.
To start testing you can now reboot using :
sudo reboot
The Cron Job part was taken from - http://www.raspberrypi-spy.co.uk/2013/07/running-a-python-script-at-boot-using-cron/

Amazon

Donate

Donate Towards More Raspberry PI's for Projects